As I said in the previous post I needed to remake my CNC controller boards. Here’s the work done.
Board cutting.

Filing.

Edge lapping. Wet sandpaper gives great finish to the edges, and makes deburring easier.

Cleaning. I used to use abrasive sponge here, but a good polishing a cleaning works well.

Preparing transfer. In the past I’ve used plain laser printing method, but press’n peel paper makes it easier. I suspect scale of the Y axis of my printings it’s a very little shrink, so I will do some tests next time.

Iron. Not too little, not too much pressure. You can guess what I did with the cloth.

Retouch. There’s always some details to retouch; I never get a perfect transfer (please note thin lines are 0.016 width, tough). I had to repeat one defective transfer.

Etching. Ready within minutes if you swing the plate.

Toner cleaning. Some acetone damp papers will do the work.

Tin coating. So great product!. Next time I will use a plastic food box so I can store it for next use.

Checking and correcting. Sometimes there are very thiner bridges between paths. They can mess all the work.

Drilling. I have a mini drill press, but hand drilling works far best for me. I broke several of these carbide drills at the beginning some years ago, but not this time (very frustrating, as I remember). As widely known by EAGLE users, one of the keys is to use the “limit drill diameter” ULP.

Flux coating. Mine dry very fast, so I should apply within 5 seconds or so to get a clean coating.

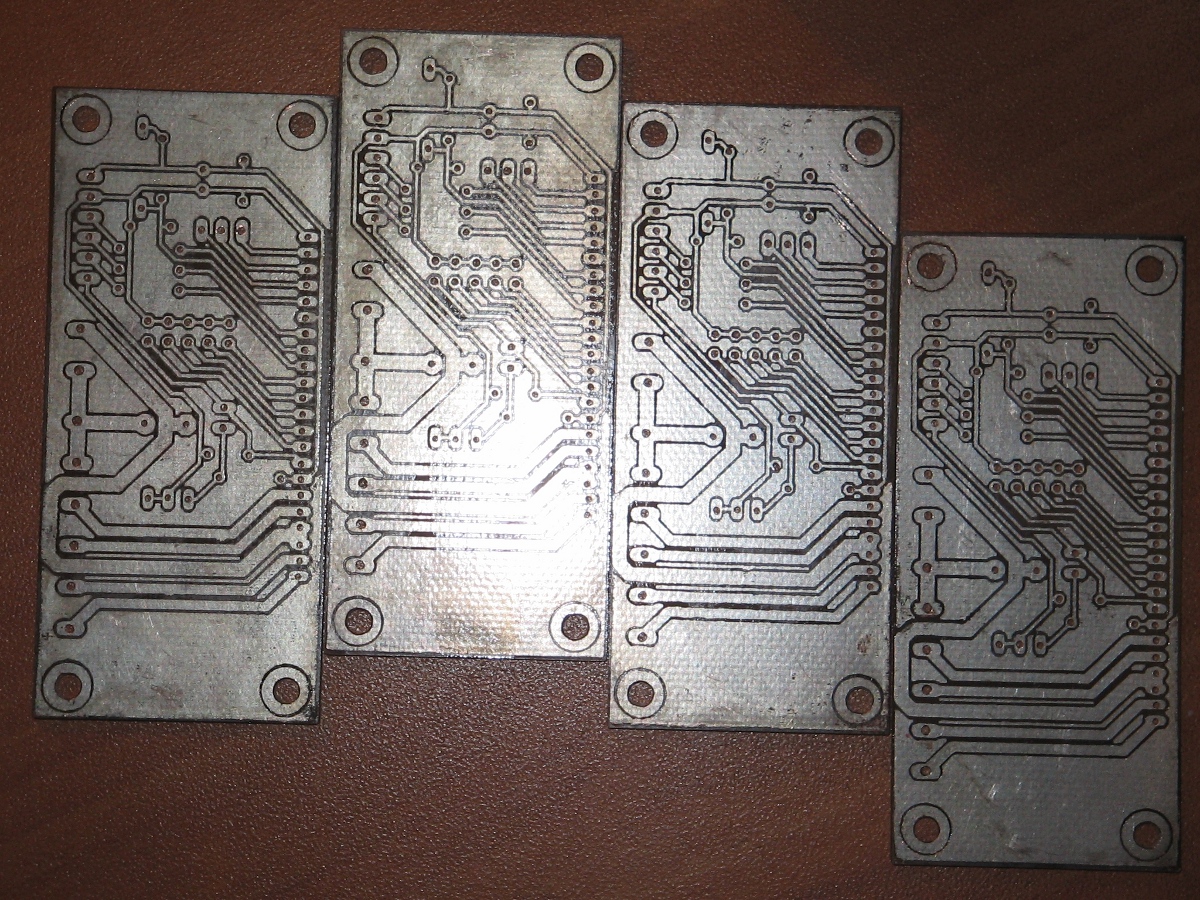
Look finished pcbs. Good enough for me.
Soldering. I like to use 0.5mm solder wire, but this time I did all with 1mm solder wire. It’s easy to put too much solder with this.

Mounting. Here’s the finished core of the controller.

That’s all. BTW, at least two of these boards works well (haven’t tested the others).

Thanks for the brief tutorial. I could see myself doing this for my arduino bartender project. Check it out: http://www.theliquorator.wordpress.com